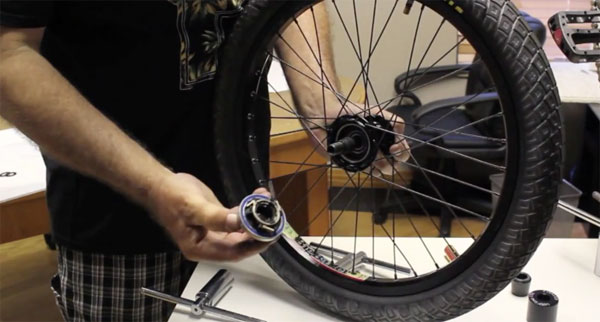
Today is the day I’m sure a bunch of you have been waiting for! Profile Racing have released a bunch of videos giving us a look at all the different slack options for their Z-Coaster that has been in the works for quite a while. They have even released a video showing you how to change the slack cam ring which gives the first look INSIDE the hub since that has been top secret until now… Even the samples the team riders are on are welded sealed so they couldn’t open them! Check out the different videos after the jump! The Z-Coaster should be available by the end of April if all goes to plan!
“Profile Z-Coaster Slack-Cam Ring B. 60 Degrees
Slack Cam Ring B. provides Z-Coaster slack of:
60 degrees (1/6 of a crank rotation)
Slack Cam-Cam Ring B. and C. (75 Degrees) work best for flat/street/ramp depending on your preference.
Slack Cam rings with different degrees of slack can be bought separately.”
“Profile Z-Coaster Slack-Cam Ring C. 75 Degrees
Slack Cam Ring B. provides Z-Coaster slack of:
75 degrees (1/5 of a crank rotation)
Slack Cam-Cam Ring C. and B. (60 Degrees) work best for flat/street/ramp depending on your preference.”
“Profile Z-Coaster Slack-Cam Ring A. 20, 33, and 45 Degrees:
Slack Cam Ring A. provides Z-Coaster slack of:
20 degrees (1/18 of a crank rotation)
33 degrees (1/12 of a crank rotation)
45 degrees (1/8 of a crank rotation)
These slack options are suited more for flatland riding.”
“Profile Z-Coaster Slack-Cam Ring D. 90 Degrees
Slack Cam Ring D. provides Z-Coaster slack of:
90 degrees (1/4 of a crank rotation)
Slack-Cam ring D. offers the most slack.”
“Steps to follow along with the Profile Z-Coaster Slack-Cam Ring Removal/Installation:
1. Remove drive-side jam nut.
2. Remove driver from axle (Bearing may be attached to driver, which is ok).
3. Use small screwdriver and begin to unwind spiral retaining ring. Use your hand to continue unscrewing the retainer ring off the driver.
4. Remove Flat Spring Spacer from driver.
5. Remove existing Slack-Cam Ring.
6. Replace with desired Slack-Cam Ring (***Be sure to have the laser etched side of the ring facing outwards. It will not work if it’s inserted upside down).
7. Re-install Spiral Retaining Ring (Snap Ring). This can be done by screwing it back into its retaining slot by hand. But we strongly suggest using the Z-Coaster Snap Ring Installation Tool.
The tool makes installation extremely easy and prevents any damage to the spiral ring.
8. Re-Install Flat Spring Spacer (***Be sure Flat Spring Tab is in desired Slack Setting Slot).
9. Depress the three pawls with your fingers. Rotate Slack-Cam Ring counter clock wise to lock pawls in down position.
10. Make sure Driver Support Bearing is either on the driver or in the hub shell.
11. Now you can re-install the driver into the Z-Coaster by hand.
12. Install and re-tighten jam nuts (***Jam nuts MUST be tightened for Z-Coaster mechanism to work)
13.Go Ride!”
All the latest BMX videos, BMX bikes, news, products and more can be found in the DAILY SECTION!

