There’s no denying that the freecoaster revolution has taken place and that it has become a focus product for many brands throughout the BMX industry. In the past two years we have seen a huge influx in the number of freecoaster hubs available and because of that we have seen improvements in the overall quality of the hubs.
Personally, I’ve never ran a freecoaster in my 15 years of riding and I guess up until fairly recently I shyed away from the idea because of the horror stories I’ve heard over the years from maintenance and the expense of replacing things like bearings. Once more brands started releasing their own take on the freecoaster hub and a huge flood of videos from pretty much all of the top street riders making riding with a freecoaster look pretty amazing, my interest was peaked and I finally caved and decided to see what all of the hype was about. About two months ago, I got my hands on one of The Shadow Conspiracy‘s Raptor freecoaster wheel and started seeing how things worked going backwards. After countless sessions, a lot of frustration and excitement, I decided it was time to do a little review. Let’s do this…
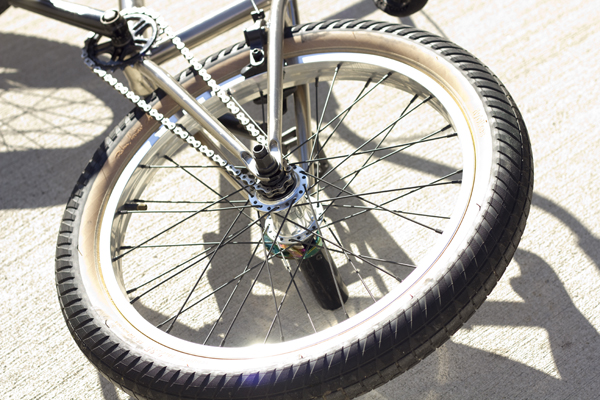
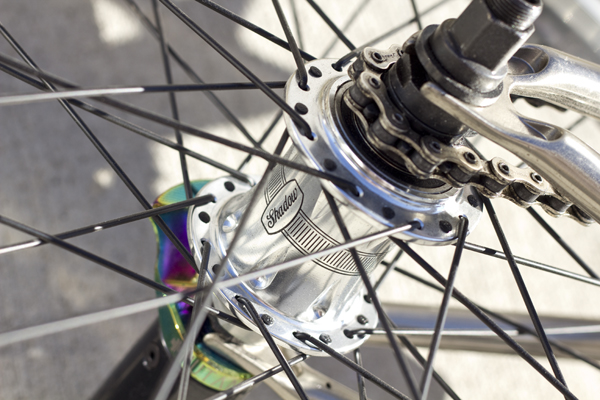
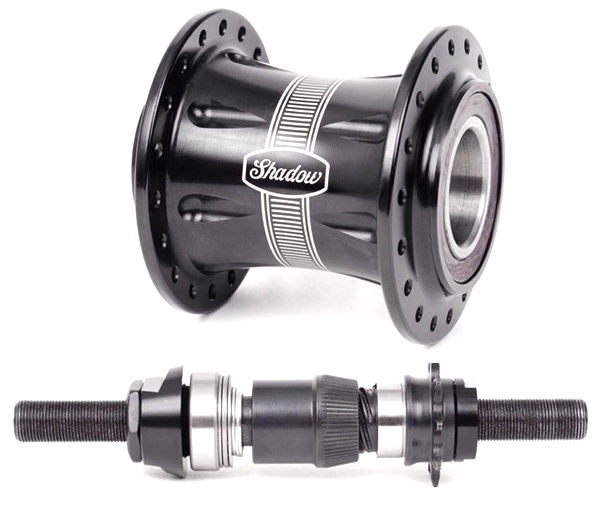
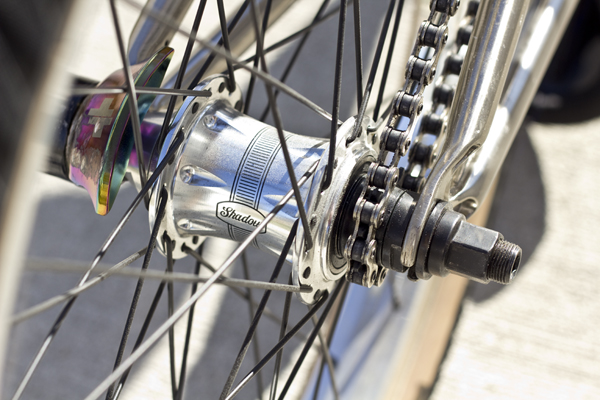
The Raptor freecoaster starts out with a 36-hole CNC machined 6061 alloy shell with a 14mm solid chromoly male axle, an angular contact bearing for side load support, a precision sealed hub shell bearing, a one-piece 9 tooth chromoly driver with a needle bearing and catridge bearing, a thrust bearing behind the clutch to help reduce drag while back pedaling inside and chromoly cone washers to keep it all tight. The hub is available in black or polished with a weight of 23.2 oz.
Now, like I said above, going into this one I had never actually had a freecoaster of my own. I had played around on a few friends bikes’, but never anything substantial enough to really get a feel for it. So, after seeing what could be done with a freecoaster, and being in a bit of a dry spell as far as progression goes, I figured it would be worth giving it a shot and seeing if it could get the creative juices flowing. This review will be a little different since I am going to talk a little bit about the experience of teaching myself to ride with a freecoaster since I have a feeling a lot of you considering a freecoaster haven’t actually had one before.
Starting out, I figured the biggest challenge that I would run into is actually getting myself to not back pedal when going fakie. After 15 years of constantly remembering to back pedal when going backards, it honestly was a little bit of a trick to keep myself from doing it. The other side of that is that I would hop into a fakie and realize the hub was engaged and get a little loopy trying to get a quick back pedal so it would disengage and coast. If you have never ran a freecoaster before, expect to take some time to really feel out how the hub works. I had the stock amount of slack on the Raptor hub, about a quarter turn of the cranks, which from what other people I’ve talked to seems to be a pretty decent amount, but others do tend to run a little more. I was curious as to if it would have been a little easier of a transition if I could remove most of the slack, but ended up keeping it how it was since I figured there was a reason that Shadow decided to go with what they did.
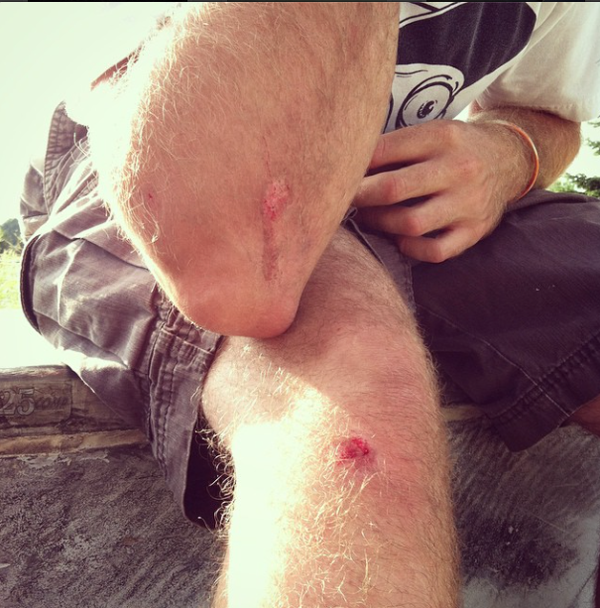
Along with getting used to going backwards, I struggled a bit with getting used to not having instant engagement when I pedaled forward. I went from a Profile Racing Mini cassette hub to this hub and definitely spent some time hitting my knee on my stem because of that slack. The above photo is from me literally going over the bars while going forward because I back pedaled and disengaged the hub and then tried to pedal forward quickly. Imagine a Vander Roll while going forward pretty fast, haha. This is when I really started to accept that freecoasters are not only initially pretty challenging to ride, but are not really for everyone, haha. I also realized just how much I relied on pedal pressure to do a lot of the things I like to do on my bike. Suddenly everything from simple tailtaps and manuals on quarters to getting out of 540 tailtaps, fufanus and even getting out of some grinds required me to retrain myself to do the tricks without a little extra support. Over time, I figured things out and those issues all started to resolve themselves and I was able to start pushing myself to try new things, but it’s not like I hopped on this thing and started firing out crazy tricks guys like Devon Smillie do. I think the biggest thing to take away from this is that if you aren’t familiar with riding a freecoaster, it might be really frustrating at first, but over time it does start to get a lot easier. Be patient with it because there were times I wanted to rip the wheel off and give it up, haha.
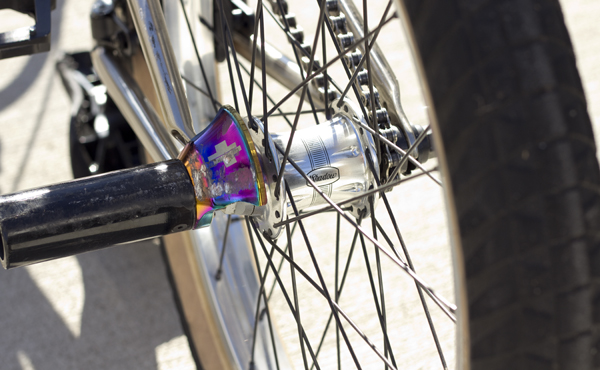
Some of you might have noticed some oil slick in the photos above. I was fortunate enough to get my hands on a sample of Mutant Bikes Peguard, which incorporates a peg and hub guard that runs out the outside over the drop out. We’ll take a closer look at this another day though… I should mention that Shadow does offer a guard that slides over existing hardware for those of you who like to grind. I highly suggest a hub guard for any hub you ride since it can save you big in the long run between protecting the hub shell and your spokes.
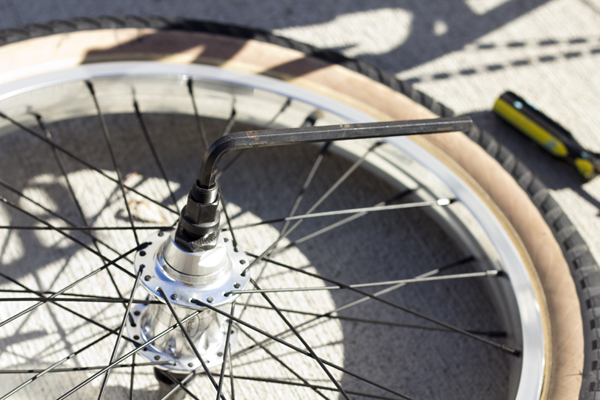

After riding the hub for a little while, based off the past stories I had heard about freecoasters, I expected that I would be spending quite a bit of time making adjustments, replacing bearings or something. I am not the craziest rider and I don’t send myself down huge rails or drops, but I’d say I put a fair amount of stress on the hub from grinds, landing pretty heavy from drops or rotations coming up short. The only real scare I had with the hub was something that most hubs will experience, and that is an initial break in period where the bearings may seat into place better than when they’re put together in the manufacturing process. I was mid session when I thought my headset was loose or something, then I picked up my back wheel and realized that the hub had a lot of play in it. I figured I blew out some bearings, so I took the wheel off and checked out the cones to see how things were looking. I realized the cone nut was finger loose, so I tightened it down. As you can see above, the axle has an 8mm hole which makes tightening and loosening the cone nuts a hell of a lot easier. I tightened the cone nut down and tossed the wheel back on and it was good from then on. Obviously, some of you guys sending it might experience more issues, but I’d imagine the hub will hold up proper for the majority of you. I did take the whole hub apart for the sake of just taking it apart for a better understanding of how it all works. Everything looked like it was still in good condition.
Overall, I was impressed with the hub and I didn’t run into any of the nightmares that I had expected going into it. I did realize that riding a freecoaster has its advantages and disadvantages and that although it seems like everyone is running one, it’s not for everyone’s riding style. If you’re considering getting your hands on one, it’s safe to say that The Shadow Conspiracy’s Raptor freecoaster is a real good option. I know I plan on continuing to ride this hub for the foreseeable future… Even though I don’t think I’ll ever ride like the pros do with them, haha.
The Raptor Freecoaster is available in right or left side drive with color options of black or polished for $169.99 on Dan’s Comp or you can have your local shop get ahold of Sparky’s Distribution to get yourself one ordered up today!
You can find out more about The Shadow Conspiracy and their products by visiting their website — TheShadowConspiracy.com