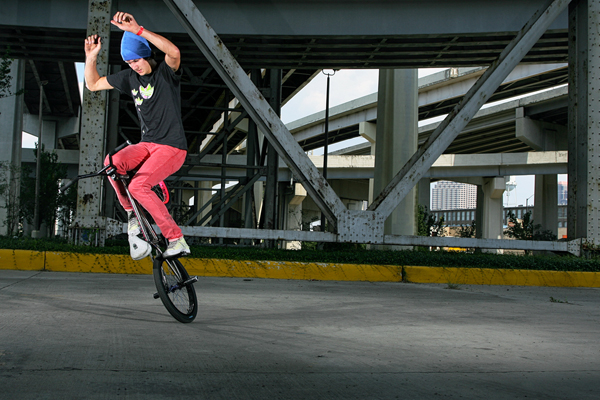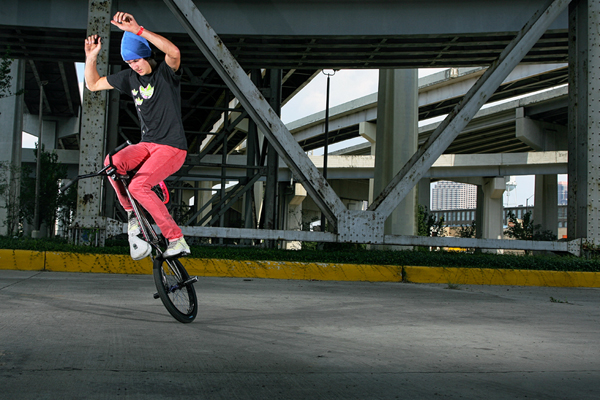
I was recently going through my old archive folders and came across some photos of Matthias Dandois who just so happens to be one of the most well known flatland riders in the world at the moment. The thing is though, it wasn’t always that way and at one point you would be hard pressed to find anyone outside of the flatland community that knew of him. Back in May of 2008 when I was shooting the Voo Doo Jam in New Orleans I kept hearing about this young kid from France that was amazing and that I really needed to try and shoot with him. Terry Adams specifically made it a point to meet up with him and make it happen. Little did I know that he would go on to win flatlander of the year the very next year at the Ride NORA Cup awards and go on to become an inspiration to the BMX community as a whole and bridge the gap between all disciplines. If you ride BMX, and you don’t enjoy Matthias’s riding you should just sell your bike and get a pair of rollerblades because it wasn’t meant to be. Even though it didn’t take very long for Matthias to make moves here in the States, I consider myself lucky enough to have had the chance to not only meet him five years ago but also to shoot with him as well on a one-on-one basis back before most people even had a clue as to who he would become. Looking back on these photos made me want to come up with an idea for a column so I decided to take one of the photos we shot and do a re-edit of the original almost five years later for this week’s TTL.
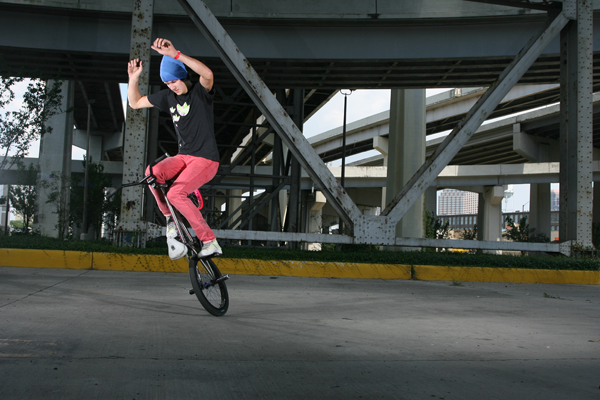
Here is the original image completely un-edited.
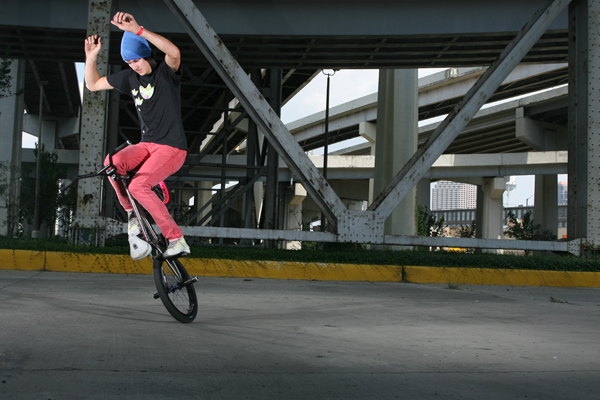
#1. Cropping the image
The first thing I did was go in and make a simple crop to line things up a bit better. Since there are so many straight lines in this photo I had to do my best with picking out exactly what it was that I wanted to line up. If I rotated the image to make the yellow curb straight the upright for the bridge on the right hand side got cut off in a weird way and so on. This is the best way to dial in a photo if you don’t get the exact crop that you want in camera. Typically this doesn’t happen and I try to crop in camera as much as possible but with flatland specifically you have to be constantly moving around to get the timing of the trick right which could throw some of your lines off.
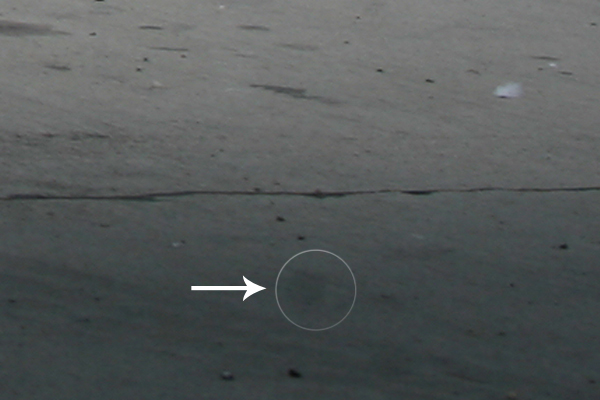
#2. Check for camera spots
I seriously hate camera spots and they are my worst enemy. A “camera spot” is just a spec of dust or dirt or whatever the hell on your sensor and it looks like a little blurry dark spot. Sometimes they are really obvious and sometimes you really need to look close to find them. It can actually be a huge deal if your sensor is really dirty and make tons of extra work for yourself. So, basically the lesson here is to keep your sensor clean. Be careful when changing lenses and do it very quickly when you do. Cleaning a sensor is fairly easy and you can buy sensor-cleaning kits to do it yourself. Although it’s easy to do, it’s also easy to mess up so you can also take it in to a professional shop and have them hook it up. The last thing you want to do is damage your sensor as that is the heart of the camera. During this process I also take some time and clean up any small imperfections in the photo. Like, for instance in this one I cloned out some of the tiny pebbles on the ground that were kind of distracting to me and fixed up a few little white spots on the yellow curb. I am fairly o.c.d about editing so this may seem a bit excessive but after editing photos for over a decade you get to know what you like and what you don’t like so I just let it happen. If you look at the original and the final version you most likely would never be able to tell that at all though and that’s the point.
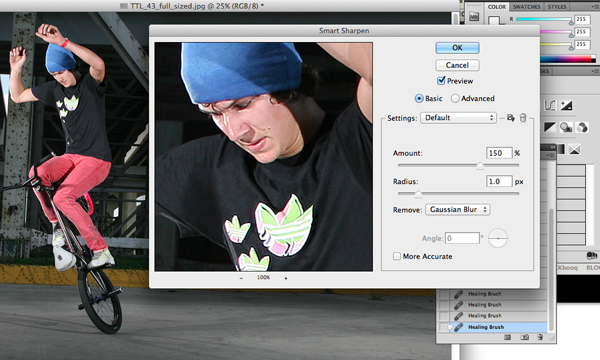
#3 Sharpening
I typically just use the “smart sharpen” filter. One very important thing to understand is that there is nothing worse than over-sharpening. The last thing you want is for someone to look at a photo and see that it has obviously been sharpened and “photoshopped to death.” So, take it from me and take it easy with the sharpening. If you did your job right in the first place your photo should be pretty sharp already. What the smart sharpen filter does is just clean it up a bit and really give some definition to certain lines and brings out detail where it might not have showed before if you do it right. I just usually go with around 100-150 for the amount 1.0 for the radius. I also tend to keep it on the “Gaussian blur” option as well. I feel like this one does the best job and is the most noticeable.
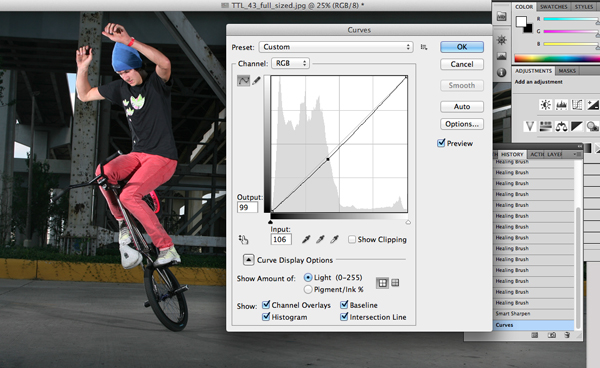
#4. Curves This is where you want to adjust your exposure and tighten it up a bit. Again, if you did your job right in the first place your photo should be pretty close to a correct exposure. Of course there are always ways to make any photo better but just like with the sharpening, too much ruin a photo very quickly. Be subtle with it, and if you don’t know what your histogram is or does, go do some research online. Once you understand how it works you can adjust your shadows and highlights and get them dialed in.
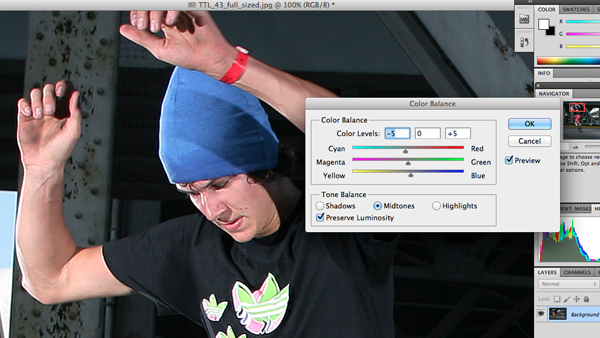
#5. Color Balance
Adjusting your color is obviously an important part of editing. Having an eye for it helps but practice also makes perfect. Everyone sees colors a little differently so it’s hard to be perfect especially depending on the color calibration of your monitor too. There are a lot of factors but the basic idea is to get skin tones to look as natural as possible and that’s why a lot of the time I will zoom in tight on the riders face and adjust the color. That way I can really see the changes I am making. Typically I take out some yellow and red depending on the color temperature of the photo and how warm I want it to be. It all depends and obviously every photo is different. Once you get a feel for a true “color correct” photo you will be able to see what needs to be done pretty quickly.
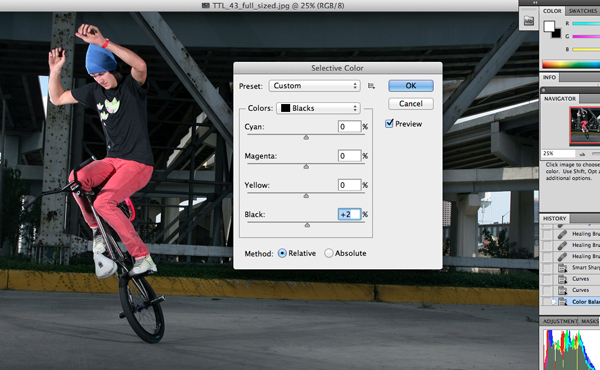
#6. Selective Color
I try to use this at least to some degree in every photo. I usually just bump up the blacks a little bit to give the photo a little more contrast. Or, maybe I will adjust a sky here and there and deepen the blues a bit but it all depends on what kind of a look the photo has and what you are going for. It’s just a nice little trick to know when you want to add some contrast to the blacks.
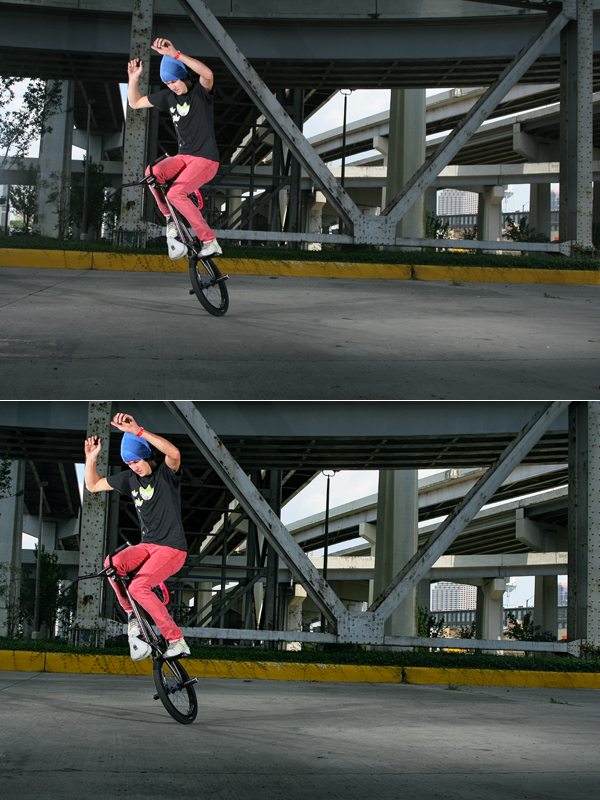
#7. Final Adjustments
I use a few different custom made filters that I lay on top of the photos as a new layer and then blend using the opacity slider. It ends up being a subtle change that I really like and gives the photos a bit of a unique look since it’s a custom filter. There’s a lot of plug-ins that you can get that feature a bunch of different filter options so do some research and check them out. Some come with trial versions so you can get a feel for them before committing to buy. If you notice, the photos don’t appear to be too drastically different from each other but that is the point. You never want to over-edit a photo.
And this is the final product. The approach that I take with editing is similar to the way that I used to work in the darkroom when I would mess around with dodging, burning and other printing techniques. The objective is to create an appealing image that people will get something out of whether it be inspiration to ride, or an inspiration to shoot I always try to evoke some kind of feeling through my photos.
Another week, another TTL and that’s a wrap. It’s almost crazy how fast time flies sometimes. It feels like I just wrote the first TTL a week ago. Hopefully you enjoyed a look at this re-edit and the chance to see a young, Matthias before BMX stardom. It was really enjoyable to be able to look back into history and pull an old photo from the archives and breathe some new life into it. Be sure to check back next Wednesday for the forty-fourth edition of Through the Lens and as always feel free to leave any questions in the comments section or email me at info@jeremypavia.com and I will hit you back as soon as I can. Feel free to follow me on Twitter and Instagram @jeremypavia.
