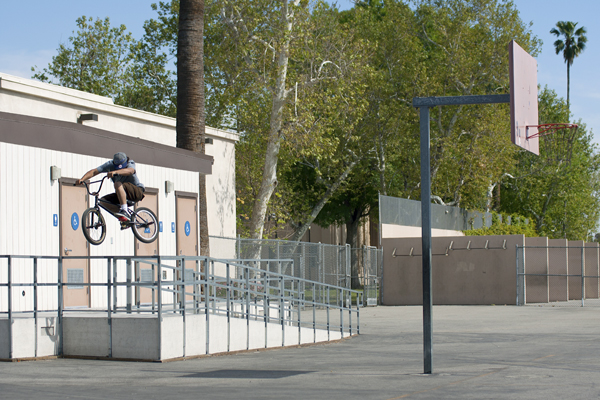
When it comes time to sit down and edit photos after a shoot everyone has their own process and steps that they go through to get the final look they are after and technically there is no right or wrong way to edit a photo. But, of course there are a few guidelines that you can follow to keep your photos looking on point and that is the basis of today’s TTL. I wanted to run down a few steps to help clean your photos up and make them pop. The key to a well-edited photo is making sure you don’t over do it. Every adjustment should be done for a specific purpose and the end result is something that you want people to appreciate without knowing exactly what you did to achieve that certain look. For the first editing column though I wanted to keep things very simple and give some insight into a few basic editing techniques using Adobe Photoshop that every photographer should know. Check it out.
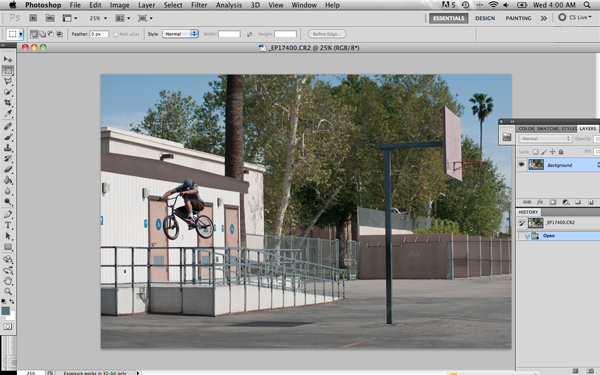
Clean up your camera spots.
Camera spots are a pain in the ass and depending on how dirty your sensor is it could take a while to get rid of them. Sometimes there can be 20-40 spots in a single photo. If you are at the point where cleaning up your camera spots is taking you more than a minute or so, you need to take your camera in and get your sensor cleaned or get a do it yourself kit. The easiest way to get rid of a camera spot is to simply use the healing brush tool and select a similar clean area right next to the spot and then “heal” it. This typically works best with a sky or solid color. If you happen to have a camera spot that is a little harder to work with or in a tricky spot then I would switch to the clone tool and clone it out. The end result will be the same and it takes some time to learn when to use each specific tool but the main goal of getting rid of your camera spots is the same either way.
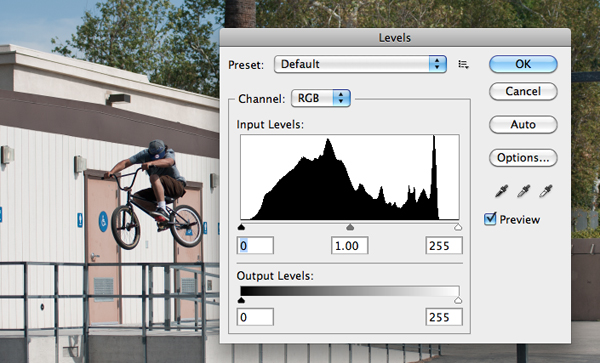
Adjust your levels.
Once you finish cleaning up all of the camera spots then move onto the next step-adjusting your levels. Basically this controls your exposure and helps to add a little contrast as well. If you have a proper exposure to start with the adjustments will be subtle but every photo can benefit from some tweaking to the levels. Once you open up the levels adjustment it will show you the photo histogram and your highlights are adjusted with the slider on the right, your shadows are adjusted with the slider on the left and the middle one is for your mid-tones. I typically slide each side over until I see a little more contrast within the photo while keeping the detail in the shadows as well. Adjusting the levels is something you will get used to over time but it is a pretty accurate way to dial in your exposure and make some minor tweaks to get it just right. One thing that helps is to mess with the sliders and just simply try to get an understanding of how each one affects the photo. Take each one and slide it back and forth and really pay attention to what part of the photo changes.
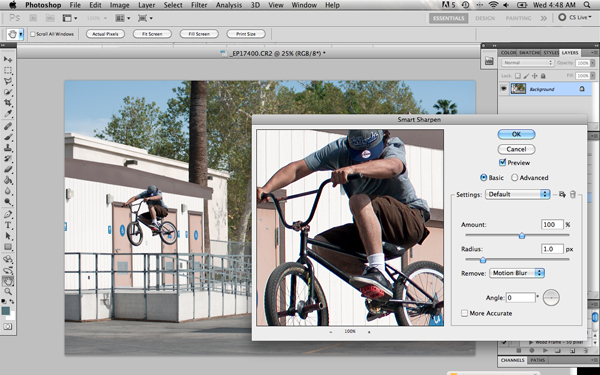
Sharpen your photo.
Of course the goal with any photo is the have it be as sharp as possible or at least have the subject of the photo as sharp as possible. This all actually starts in camera when you are taking the shot but can definitely be enhanced with the use of the smart sharpen filter. Go to filters, sharpen, smart sharpen and make sure you are looking at the image at 100% zoom to really see the details. I typically keep it on the basic setting and go from there. You can clearly see the amount of sharpening when you slide the “amount” slider and as you do just pay attention to how much the image is changing and you can see there becomes a point that just looks right. You don’t want to over-sharpen an image, as it can become grainy and weird looking very quickly. As I mentioned before you want the edits that you are doing to be subtle. There are a few settings you can mess with under the “remove” tab. You can either remove Motion Blur, Lens Blur or Gaussian Blur. Each one affects the photo in a slightly different way but the changes are hard to notice so I would go through each one and decide which one you prefer based on every photo. I have noticed that each photo is different when it comes to those selections so just base it off of the specific photo you are working on at the time. For this one I left it on Motion Blur and slid the “amount” slider over to 100 and kept the Radius at 1.0, which sharpened the photo, just the right amount.
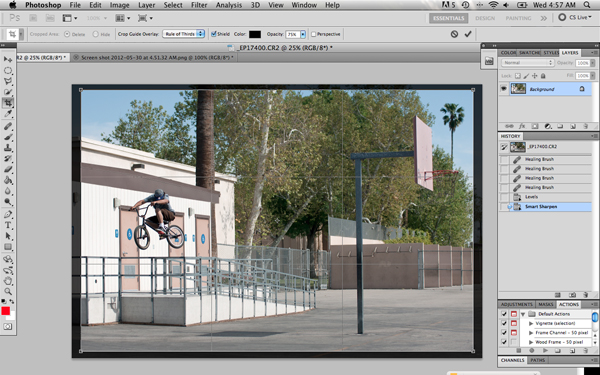
Make the final crop.
You always want to try to crop “in-camera” which means that when you are shooting the photo you are cropping it exactly the way you want it to look but of course there are times when you need to do a little fine-tuning after the fact. In this case, there was a tiny bit of the men’s bathroom sign on the left of the photo that was distracting to the eye that I wanted to get rid of. This is a very subtle change and most people wouldn’t worry about that tiny detail but it’s those exact things that help turn a good photo into a great photo. Paying very close attention to every part of the photo goes a long way. Take the crop tool and set your height, width and resolution accordingly. Typically it helps to keep everything the same just as it was shot for the initial cropping so do just that and make sure not to crop out any important details.
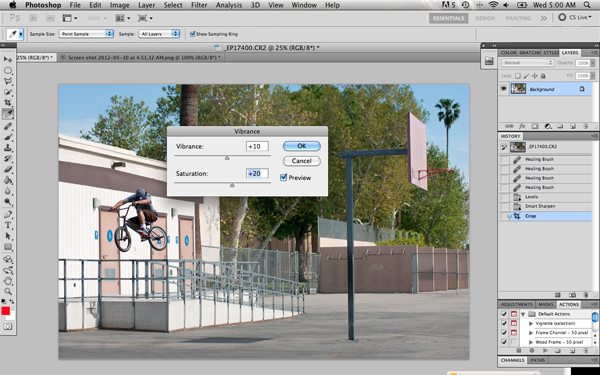
Enhance the saturation.
I find that it helps to add a little “pop” to your photo when you up the saturation/vibrance. This is one of those adjustments that has to be subtle. There is nothing worse than an obviously over-saturated photo. The colors shift, and it just looks gross. Be sure to watch the change as you are making adjustments and always go back and forth between the original and edited version by checking the preview box to see the changes. You might be surprised at how little you need to do to help bring some colors out.
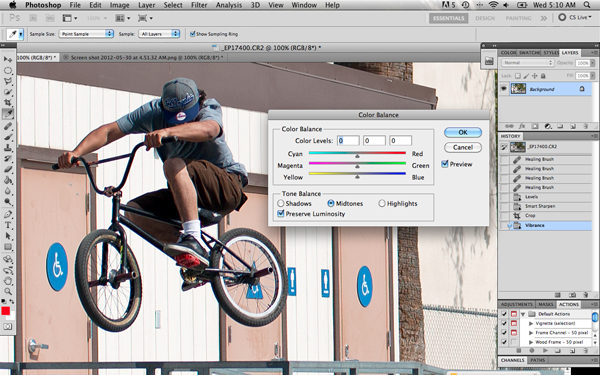
Color correction.
The final step is color correction. This may be the most important step in the entire process. You want to make sure the skin tones and sky look as accurate and true to life as possible by adjusting the color bars. This is something that actually takes a lot of practice, a lot of trial and error and a true understanding of how a photo should look.
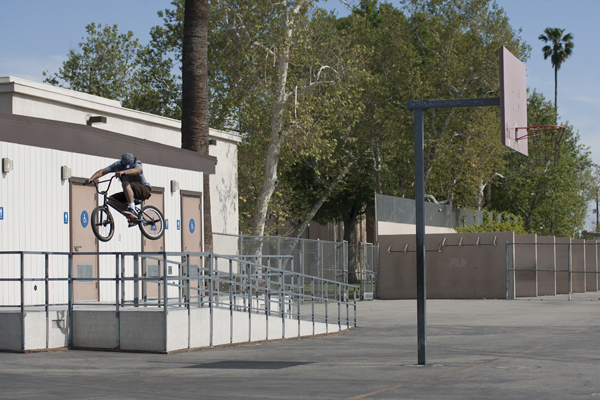
Original

Edited
With anything practice makes perfect so be patient, take your time, and don’t be afraid to make mistakes. There have been times where I have edited and re-edited the same photo multiple times until I was finally satisfied with the way it looked. Basically as long as you are stoked on the end result that is all that matters. The next TTL contest will be announced this Friday June 1st so get ready for it. It is sponsored by Madera and they didn’t hold back on the prizes so do not miss out on the chance at some free product. Be sure to check back next Wednesday for the sixteenth edition of Through the Lens. As always feel free to leave any questions in the comments section or email me at info@jeremypavia.com and I will hit you back as soon as I can. Feel free to follow me on Twitter and Instagram @jeremypavia.
Don’t forget to follow The Union on Twitter @BMX_UNION and “Like” us on Facebook — Facebook.com/BMXunion.
Check out past editions of Through The Lens below…