The other day I had a DVD show up in the mail from the Alone guys over in the U.K. Alone is a fairly new brand to me that I started taking notice of about two or three years ago, even though they’ve been around for about 10 years already. In the past two or so years, they’ve done a handful of team trips and thanks to team rider and film maker, Sean Pointing, they’ve been able to drop some really impressive videos from their adventures.
The team recently went on the “You Slag Tour” and wanted to do something special with the video from their trip, so they put together a DVD to go along with some of their past trip videos for everyone to enjoy. Let’s take a look!
Build Your Own Hubs from Profile Racing
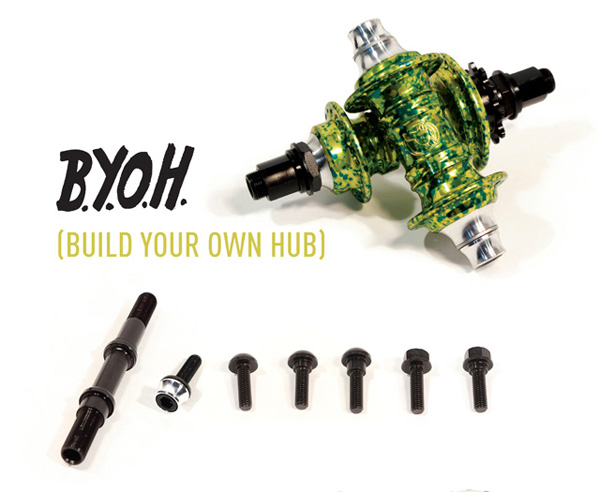
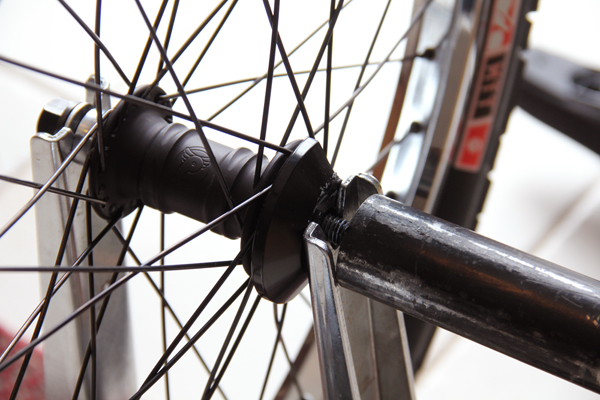
Have you been considering Profile Racing or Madera hubs? Did you know that you can actually Build Your Own Hubs and customize them to be exactly how you want them with your choice of hub shell, axle, bolts, drive and hub guards? Check out the full details below….
Growing up, I remember seeing the Profile Racing Mini hubs on different bikes and thinking about how dialed they are. It was something I always wanted to run, but for one reason or another I never could afford to do some custom wheels or I would be able to get another set from some friends or something. I knew at some point I would have to get a pair to finally get what I really wanted my bike to roll on.
One thing that’s cool about growing up is if you work enough, you’ll be able to afford the nicer things you always wanted but couldn’t when you were younger. Recently, it was time again for me to get some new wheels built up and I knew there was no way I was going to postpone getting a setup I really wanted to save a few dollars.
I was talking to Matt Coplon about all of the different options from the different bolts, axles and hub guards you could do with the hubs these days and it really made me realize there’s a lot of options and combinations that allows for you to really build up something that’s suited for what you’re doing on your bike whether it’s street riding, skateparks, trails, flatland or racing.
While we were talking about all of the options, Matt mentioned that they were working on a new program that would make it easier for you to build up a set of hubs customized to your needs without having to buy everything individually like you would in the past. They’re launching the “Build Your Own Hubs” program worldwide today, so we figured it would be a good time to give you guys a look at all of the options and explain how this new program works. Let’s get into it!
If you aren’t familiar with the different Profile hubs by now, you either haven’t been in BMX very long, or you live under a rock. That’s okay though, because a while back Dave did a real good Drawing Board interview with Profile about the History of Profile’s Cassette Hubs that you can check out. I’m not 100% sure on this, but I’m willing to bet Profile’s hubs are the best selling hubs in BMX’s history.
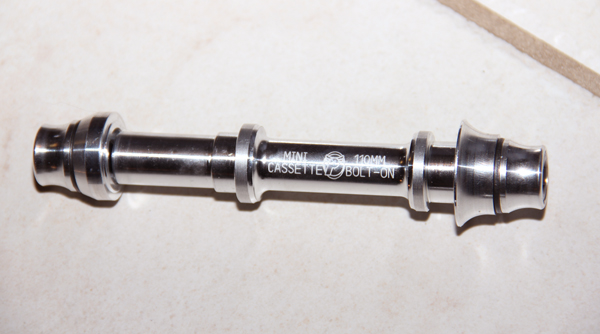
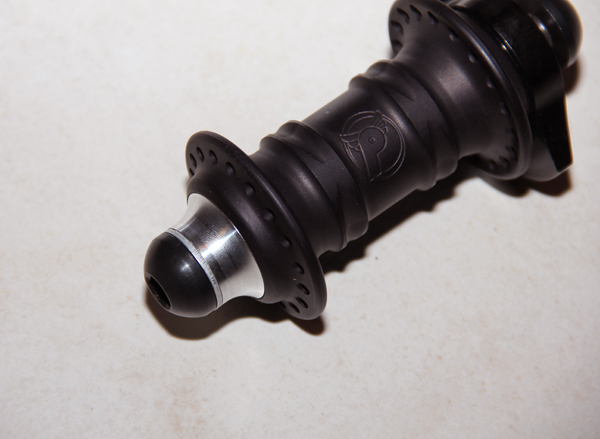
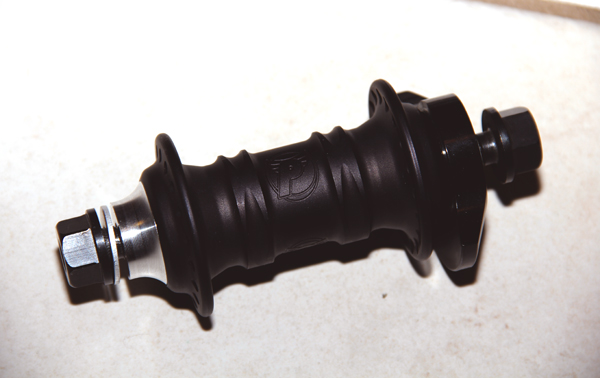
For my wheels, I personally went with the Mini hubs, which are made right here in the U.S. down in Florida at the Profile Racing warehouse (Like all Profile Racing and Madera hubs, cranks, etc.). The hub shell is made from machined 6061 aluminum with two sealed bearings and a chromoly one-piece driver with 4-pawl engagement and 4-sealed bearings inside of the driver making for a real smooth ride. Now that’s when you start seeing options. Once you get into axles, bolts and hardware, that’s where you can start getting creative. The basic hub setup comes with a 7075-T6 aluminum hollow axle 3/8″ chromoly female bolts and the aluminum Volcano washers. In the rear you can find a 14mm GDH (Gun Drilled Hollow) axle with alloy axle nuts or a 14mm 7075-T6 aluminum axle with 3/8″ chromoly female bolts (which do fit the 14mm drop outs since below the head it turns to 14mm). But that’s just the basic setup… They’ve got multiple options that you can customize your hubs with.
With the new “Build Your Own Hubs” program, they let you pick out the hub of your choice (Profile and Madera) and the color… then it’s up to you on the style of bolts and axles you want. Here’s a little break down of the different options you can use…
Profile Mini front and Madera Pilot front hubs
-3/8 standard bolts with polished Volcano cones (7075-T6 aluminum axle)
-3/8 chromoly button head bolt (7075-T6 aluminum axle)
-3/8 chromoly 17mm hex bolt (7075-T6 aluminum axle)
-14mm chromoly GDH straight axle with alloy nuts.
Profile Mini Rear and Madera V-2 Rear hub options:
-3/8 standard bolts with polished volcano cones (7075-T6 14mm aluminum axle)
-3/8 chromo button head bolt (7075-T6 aluminum axle)
-3/8 chromo 17mm hex bolt (7075-T6 aluminum axle)
-14mm chromoly GDH straight axle with alloy nuts.
-choice of chromoly cog or a one piece driver (9, 10, or 11t)
Female axle for the rear hubs with the standard bolts and cone spacers. This replaces the 14mm gun drilled hollow axle.
Profile Totem front and Profile Elite Front hub options:
-3/8 standard bolts with anodized colored volcano cones (7075-T6 aluminum axle)
-3/8 chromo button head bolt (7075-T6 aluminum axle)
-3/8 chromo 17mm hex bolt (7075-T6 aluminum axle)
-14mm chromoly GDH straight axle with alloy nuts.
Profile Totem rear and Profile Elite rear hub options:
-3/8 standard bolts with anodized colored volcano cones (7075-T6 14mm aluminum axle)
-3/8 chromoly button head bolt (7075-T6 14mm aluminum axle)
-3/8 chromoly 17mm hex bolt (7075-T6 14mm aluminum axle)
-choice of chromoly cog or one piece driver (9, 10, or 11t)
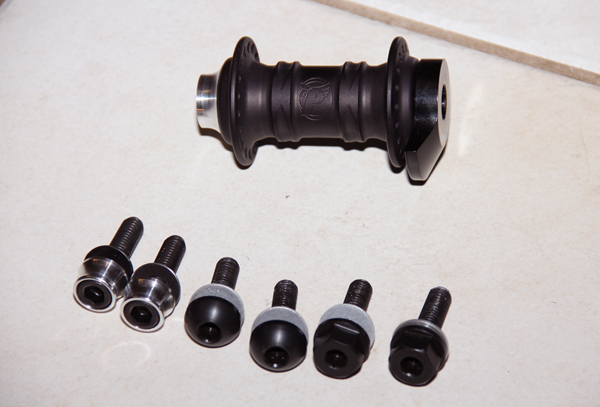
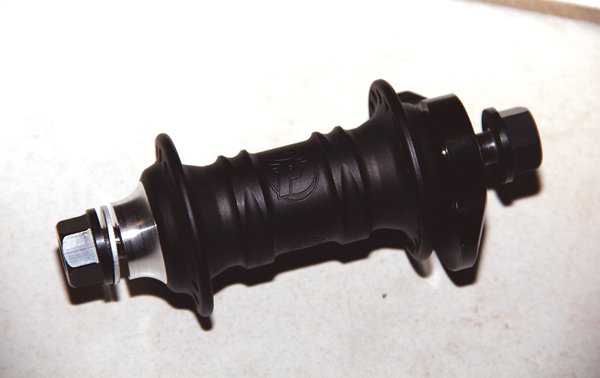
Above we have the front hub along with the different bolt options for the Build Your Own Hubs program. The furthest to the left is the standard 3/8″ chromoly bolt with aluminum volcano washers. In the middle you have the 3/8″ chromoly button head bolt, and then the furthest on the right is the 17mm hex bolt. What’s the difference in these options? Well, the standard 3/8″ bolt sticks out a little further with the cone washer, if you’re looking for a more flush look, the button head option is more ideal for your situation. I personally, due to running pegs on the right side, chose to go with the 17mm hex bolts for my front axle since I prefer using my sockets over allen keys to tighten my wheel. If you prefer allen keys, there’s tools out there that allow for you to use a socket extension and wrench.
Standard Bolts
17mm Hex bolts
3/8″ button head bolts
So what is the advantage of having the “Build Your Own Hubs” option? Prior to this, if you wanted to built your hubs using different hardware, you had two options. You could go to the Profile Web Store and pick out the setup of your choice and order the hubs with a small price increase for different bolts and if you were outside the U.S you would have that heavier shipping cost, or option two would be that you could have your local shop order you up the hubs and you could buy the bolts or axle separately.
Now you can have your local shop from anywhere in the world order you up a set of hubs with the chromoly bolts of your choice for no additional cost! This saves you money and gets you exactly what you want.
Now if you’re looking to save a few ounces, you can also upgrade and pay a little more for the titanium bolts or axle. This still allows you to order what you want and can be done directly from the shop the same way.
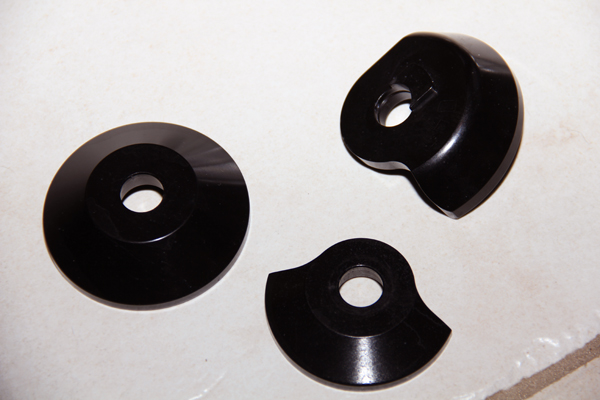
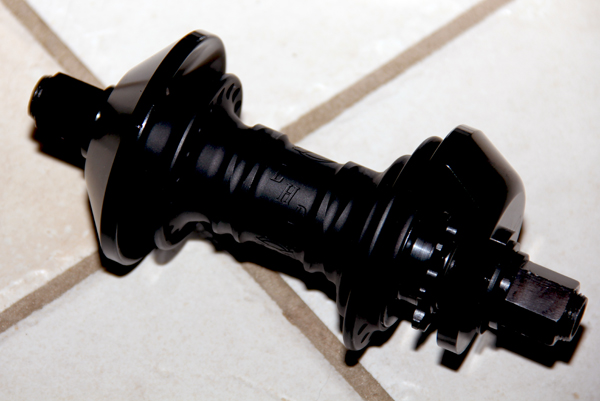
Beyond the titanium option, another upgrade you can do for some additional money is hub guards. Profile now offer the Aegis hub guards made from 7077 aluminum for your front hub, rear non-drive side and drive side. They essentially replace your cone spacers and hold the hub tight by compression from the bolts or nuts being tightened on the axle. I definitely recommend picking these up for those of you running pegs. Hubs aren’t cheap and replacing spokes all the time is a pain in the ass. So having these really help to protect your investment and will help to keep your hubs running smoothly much longer.
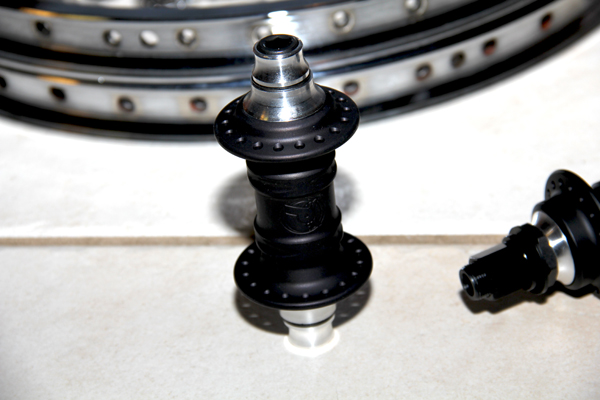
Example of both rear Aegis hub guards on the Mini hub.
Example of Aegis guard on the front Mini hub with 17mm hex bolts.
So that about wraps it up on how to Build Your Own Hubs. I personally chose to run the 17mm hex bolts up front with the stock gun drilled hollow 14mm axle in the rear with the Aegis guards on my non drive side. I laced them up to some chrome Sun Ringle Big Ballers which really make the wheels pop with the all black hubs and spokes.
If you’re looking into getting yourself a fresh set of hubs, I definitely suggest you take a look into the Build Your Own Hubs program that Profile Racing and Madera have to offer. Now that they’ve made it even easier to customize the hubs to your personal choice for the same price as a stock set, it makes even more sense to give them a go.
If you’re a shop here in the U.S trying to order a set of custom hubs, you can get ahold of Profile Racing directly or through QBP. If you’re a shop outside of the U.S, you can find your country’s distributor by clicking here.
To find out more about Profile Racing and their products, check out their website — ProfileRacing.com
UPDATE: This post was created in 2013 and since then Profile and Madera have continued to expand their Build Your Own Hubs program with newer bolt, axle and hub guard options. Below is a video released in 2017 explaining the Madera Build Your Own Hubs program that is identical to Profile Racing, since, well, they are both manufactured under the same roof in Florida!
Insight: Merritt – Brian Foster Signature Bars
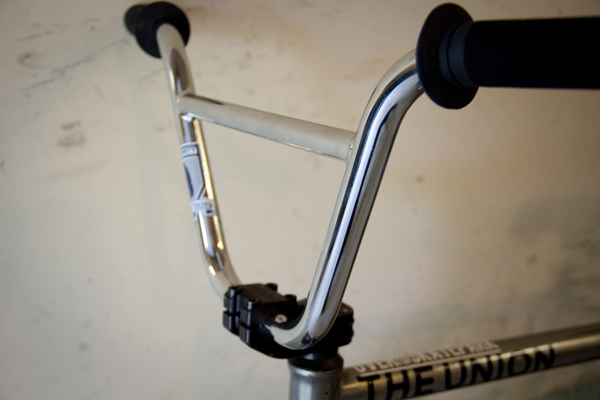
Not too long ago, two familiar names in the BMX industry, Sean Curran and Mike Brennan, announced that they were making some moves and going all in and launching a brand of their own. Shortly after that news popped up, word about Merritt started floating around. Over the course of a few months, they slowly announced a hell of a team and introduced a few products that these two were working on.
One of those products in particular were some signature bars for the one and only Brian Foster. Once these bars became available, I knew I needed to get my hands on a pair to give a go.
Doing a review of handle bars isn’t exactly something easy to do because either they hold up or they don’t. I haven’t broke a pair of bars in about 10 years so I figured instead of trying to tell you they haven’t broke in the 2 months I’ve been running them, I’d give you guys a closer look at just what make these special. Let’s take a closer look.
Review: Animal – MTT Tire
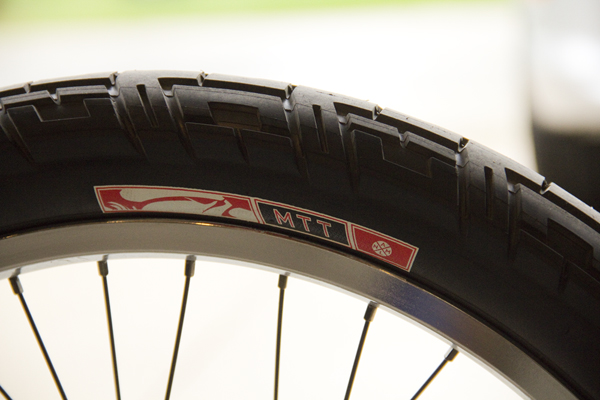
A few weeks back, I built myself up a fresh set of wheels. I figured new hubs, new, spokes, new rims… I gotta put some fresh tires on, right? With so many options available these days, I was in a pretty heavy toss up on what I was going to run. I decided to hit up our Facebook to see what people suggested. There were a ton of suggestions, with a pretty large number of votes for the new Animal MTT tires. I was already kind of leaning that way, so I figured I better pick up a set to give a go. After riding these for a few weeks, I figured it would be a good time to put together a review for those of you who are on the hunt for some new tires as well. Let’s take a closer look!
Review: Kink – “Squash It”
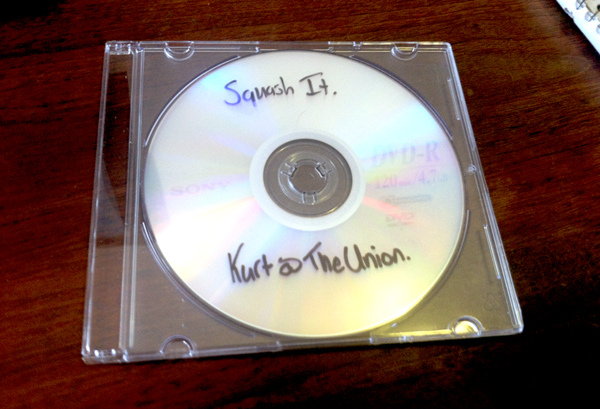
There have been a handful of videos coming out lately that I have been excited about checking out. One of the perks of dong The Union is from time to time I get lucky and get the chance to check out these videos I’m excited about a little earlier than most people. Last week I received a copy of the new Kink “Squash It” DVD to check out. Obviously, this is one of those videos that I had been itching to check out because of a number of reasons like the stacked team, Darryl Tocco was once again behind the filming and editing and that almost infinite travel budget they seem to be working with that takes them to some amazing destinations. Combining all of those things can only lead to a good thing, right? Here’s what I thought…
Review: Subrosa – Get Used To it
It’s kind of weird for me to be writing this right now. I say that because the Subrosa “Get Used To It” DVD was one of those things where I was getting used to an extended deadline over getting used to a DVD showing up in my mailbox. Going into filming for a DVD, there’s usually a plan of who’s in it, where they want to go, who will be handling the filming and editing and who will be getting everything lined up so it goes smooth. You plan the budget, set a deadline and send it…. In a perfect world.
With “Get Used To It”, I can only imagine that any sort of plans that were written up had been burned or shredded multiple times because there were plenty of changes along the way. Over the 3 or so years they filmed for this video, the filmer and editor changed, team riders came and went, cameras took shits, riders got hurt and probably a bunch of other problems that I can’t even imagine.
That’s BMX though… You can’t plan too deep into anything with BMX because the best things happen unexpectedly and if you go with the flow, it’ll all work out. I think that’s a good representation of what this video is all about…
Review: Vinyl BMX “LP”
Over the years there have been plenty of conversations about how DVD’s are dead and how videos coming out are the same thing as what’s coming out online everyday, just a little longer. Which, yeah, you could make some valid points that it is true. But I think this kind of comes full circle with the “print is dead” thing. It’s not that it’s dying out and won’t exist. It’s a product and for people to want to buy it, it needs to be something that doesn’t suck. You can’t keep repeating things forever and if you haven’t noticed, the model for how magazines are distributed has changed up with the times, and I think the same can be said with full-length videos.
I recently got my hands on a copy of the new Vinyl BMX “LP” DVD that I think is a prime example of what I’m trying to say in this intro. So let’s get into this review already…
Review: Promax – ERK Brakes
Words: Jeremy Ball
Photos: Chad Ruhl
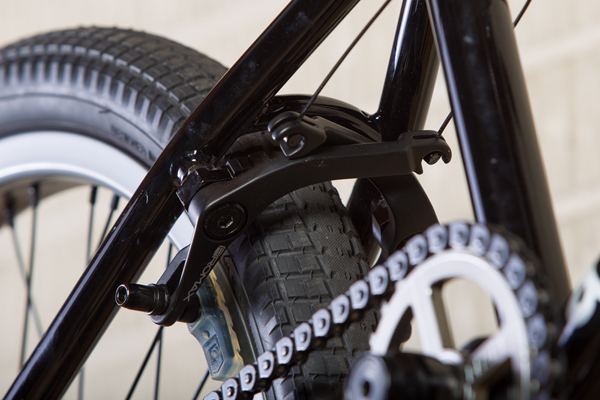
Last month during Frostbike, Jeremy Ball and myself were introduced to a brand neither of us had heard of that are more focused on racing in BMX called Promax. Going over the products, we were seeing some real quality stuff, but obviously due to it being for racing, neither of us really knew much about it. That’s when the ERK brakes caught our eyes. We were really interested in these super clean looking U-Brakes they made. After Frostbike was over, Jeremy picked up a pair for his new setup he built thanks to Deluxe to try out. After giving it a go, he decided to do a quick review for you guys to get a closer look and find out how well they worked. Let’s see what he had to say! – Kurt
- « Previous Page
- 1
- …
- 9
- 10
- 11
- 12
- 13
- …
- 25
- Next Page »