Head over to The Shadow Conspiracy website to check out a new bike check with Kevin Kalkoff and his current Subrosa Noster III setup that he is running now days! Really digging the black and polished tie dye colorway.
The latest BMX Videos, Products and News!
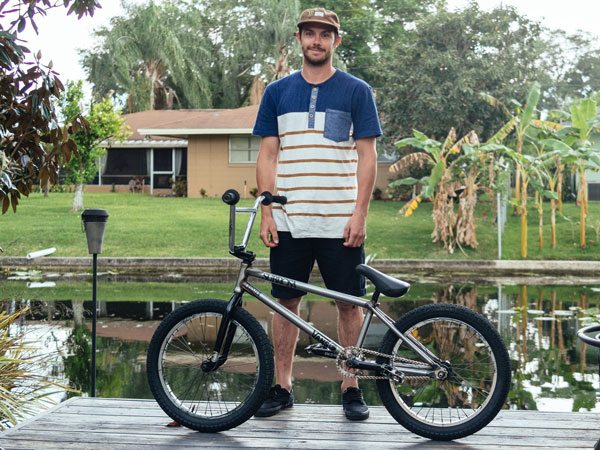
Head over to The Shadow Conspiracy website to check out a new bike check with Kevin Kalkoff and his current Subrosa Noster III setup that he is running now days! Really digging the black and polished tie dye colorway.
We don’t see a ton of footage from Woodward Copper, but here’s a rad BMX video featuring Dan “Danimal” Nielsen getting down on some of the ramps there! Dan will be at Woodard Copper all summer, so if you’re heading out that way, make sure you get a session in with him!

Get on over to the Volume Bikes website to check out a brand new bike check with Josh Clemens and his current Vessel setup that’s decked out with all the latest parts from Volume! Damn does that look like one dialed BMX bike! That colorway on the frame is so good.
Not sure how this Matti Hemmings video has been online for almost a year and we’re just seeing it… BUT! This is pretty rad. Matti covered his bike in neon paint and got a few black lights to make for a real interesting flatland BMX video. Highly suggest you check this out even if you aren’t into flatland. Actual neon colors on a BMX bike look good!
Here’s a gem we spotted on the Northern Embassy! Things have been warming up in Canada, so the Merrytimes crew have been out getting clips on the streets. Here’s their latest BMX video packed full of goodness from Matt Comeau, Andrew Phillips, Alexis Leger and Josh Gagnon!
Today we get a look at what Team Mac cooked up for their BMX video for the 4Down 1Up video contest! Watch Shawn McIntosh and Phil Martin get creative and throw down some damn good riding. The editing might give a few of you a seizure, but overall, this video kicks a lotta ass. Take a look! Did you catch Team Lacey’s video yesterday? Watch that RIGHT HERE.
“#TeamLacey’s 4Down 1Up video hit the web yesterday and now it’s time for another! #TeamMac consists of FIT teammate Shawn McIntosh and Hastings’ own Phil Martin – a perfect mix of styles. Miles Rogoish was called on to take care of the video side of things both behind the camera and computer; here’s the final result! Look out for the other teams edit’s dropping right here on DIGBMX.com over the next three days, and you’ll have your chance to vote for your favourite video along with being entered into our giveaway! Filmed and edited by Miles Rogoish” – DIG
The freecoaster wizard known as Devon Smillie is holding it down for this weeks 10 Trick Tuesday! Check out a bunch of crazy tricks he threw down during Simple Session the other weekend. Banger after banger!
“You heard that the USA’s Devon Smillie blew up at this year’s Simple Session, right? It was his second visit to Tallinn, Estonia for this now legendary comp and he knew the audience was expecting some really stylish, smooth and technical riding. Did the pressure get to him? hell no, the kid came with an incredible bag of tricks and filmmaker Philip Koelsch was on hand to capture the best of them. ” – Epic TV
Profile Racing have been ON IT with these videos giving us an in-depth look at how the Z-Coaster works. Today, we get a look at how the Spiral Retaining Ring works and how easy it is to convert the hub from a freecoaster to cassette! Take a peek!
“Section 1.
Removal of Spiral Retaining Ring Steps:
1. Remove Flat Spring Spacer or Cassette spacer from driver.
2. Snap off open end of retaining ring with small screw driver.
3. By hand, begin to unwrap retaining ring in a CLOCKWISE rotation until it is fully unwound from driver.
Section 2.
Installation of Spriral Retaining Ring with Two-Piece Tool Steps:
1. Be sure Flat Spring or Cassette Spacer is not in driver.
2. Place conical shaped tool piece (wide side down) inside the three Spiral Ring Retainer Prongs.
3. Place Spiral Retaining Ring onto cone.
4. Place opened end of second tool piece on top of the Spiral Retaining Ring and press down until it snaps into prongs.
Section 3.
Installation of Spiral Retaining Ring by Hand.
1. Slightly spread Spiral Retaining open with fingers.
2. Place opened end of ring into one the retaining prongs.
3. In a counter clockwise motion, carefully wind Retaining Ring around the prongs until the other end is securely in place.
*Part 3 can be tricky so take your time and be careful not to bend the ring. We suggest you use the tool for this.
Section 4.
Installation of Cassette Spacer.
1. Remove Flat Spring Spacer.
2. Remove Spiral Retaining Ring.
3. Remove Slack-Cam Ring (This will not be needed when using driver as a cassette).
4. Re-install Spiral Retaining Ring.
5. Install Cassette Spacer.
*Your hub will now function as an Elite Cassette Hub.”