There has always been something intriguing to me about a .GIF file. They are almost mesmerizing in a way and although they have been around for 25 years and are one of the oldest formats used on the web, they are becoming more and more popular just as programs like Photoshop are making it easier than ever to create your own. It is an amazing way to take a sequence and make it come alive right before your eyes. You can get as creative as you want and honestly the possibilities are endless. It is much easier than you think and the process can become quite addicting. Read more to find out exactly how to make your own in Photoshop CS5 and don’t blame me if you get hooked and start turning every sequence into an animated .GIF, I warned you.
Step one:
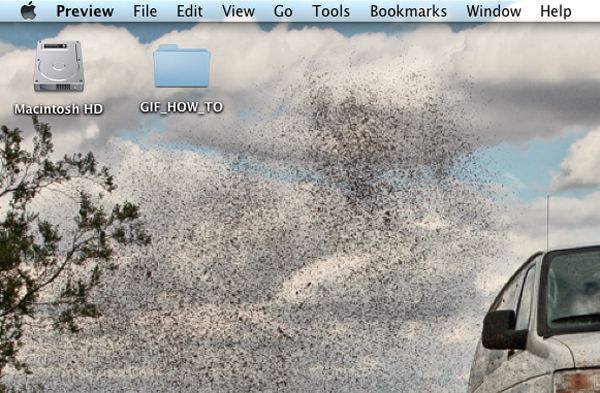
Create a folder containing the images that you want to animate. I changed the images to black and white and re-sized them to 1000 pixels wide at 72DPI. Then I saved them for the web with the quality slider set to maximum. The .GIFs can end up being pretty big files if you want to keep the quality looking good so I suggest keeping it around that size to keep things simple. Of course, you can dial things in and mess around with different sizes on your own but for the sake of the how-to, it’s easier to work with smaller file sizes.
Step Two:
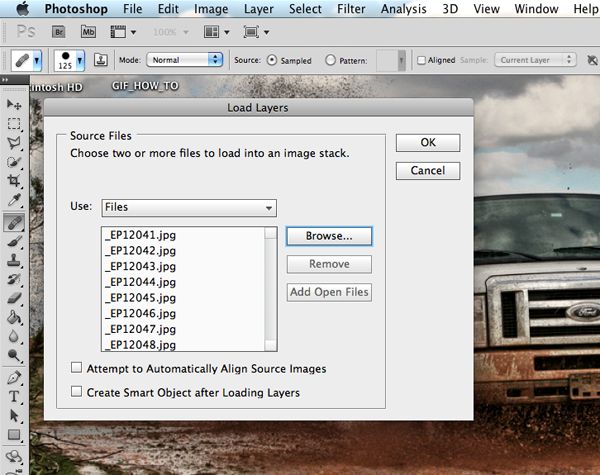
Click on “File>>Scripts>>Load files into stack.” When the window opens up, browse for your folder containing the images you want to transform, select them all and then click OK.
Step Three:
Go to Window>>Animation. When the box pops up, click on the upper right hand corner (the animation/timeline palette menu) and select make frames from layers.
Step Four:
Click on the icon in the lower right hand corner to make sure that you are in frame view and not timeline view. You should be seeing small thumbnails of all your images.
Step Five:
Now click on the icon in the upper right hand corner again and click “Select all frames.” Once you have done that then click “reverse frames.” This should actually put them in the correct order. If for some reason it ends up being backwards or the files got mixed up just reverse it back.
Step Six:
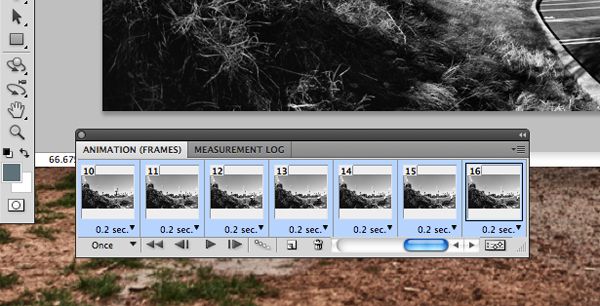
Now that all of the thumbnails are selected you need to set the duration in between photos. Since they should still all be selected you just need to change the time on one frame and I found that .02 sec works best for me and seems to flow pretty well for sequences. You can mess around with the different times but .02 sec looks pretty clean.
Step Seven:
Pay attention to the lower left hand corner and you will see a little drop down menu. Click on that and select “forever.” What this will do is make sure that the sequence loops over and over so it continually plays. I suppose that is where the “mesmerizing” aspect comes into play like I mentioned earlier because you can get stuck staring at it and watching it again and again.
Step Eight:
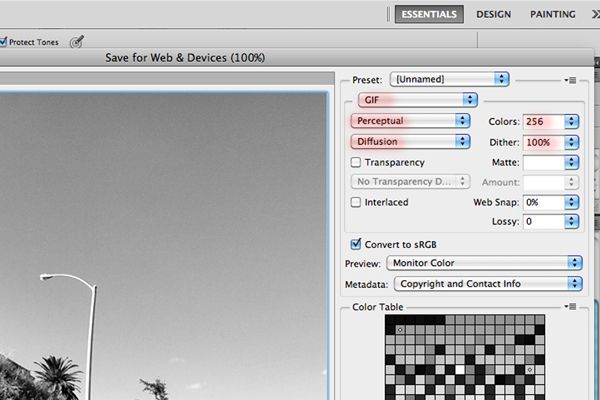
Now go to file- save for web. There are a few different settings that you can mess around with to change the quality but the settings you see here seem to look the best as far as I’m concerned. Always remember to try out different settings and see what works for you.
Step Nine:
Watch your sequence in action! The easiest way to do this is to simply drag the file right into the browser menu in Safari, Firefox, or whatever browser you use. They all should do the same thing and play the .GIF right in the browser. Then sit back and enjoy.
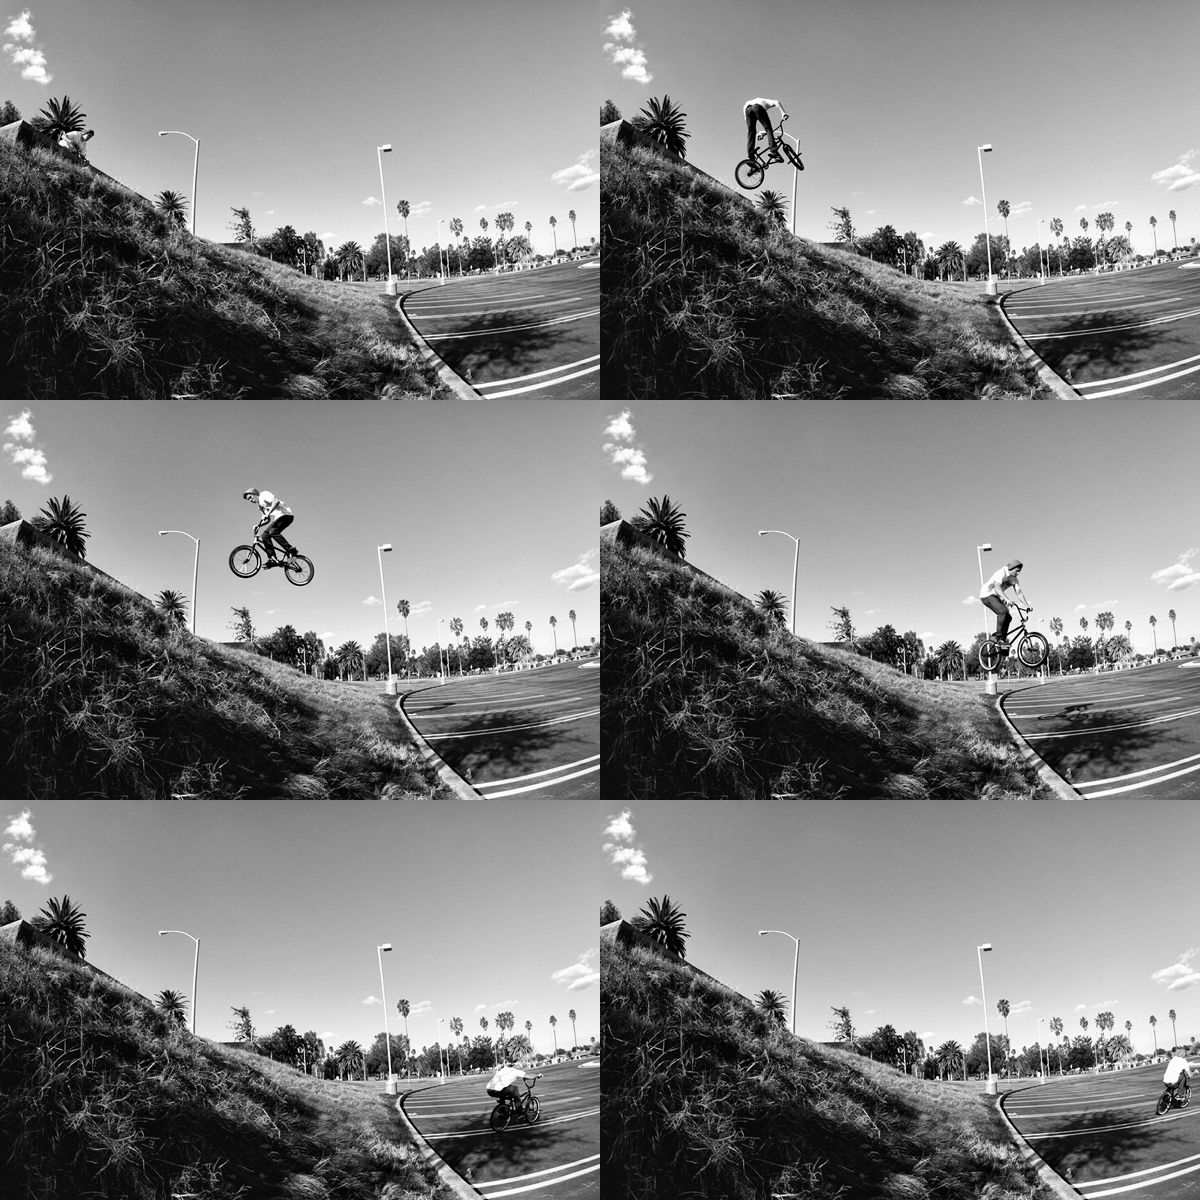
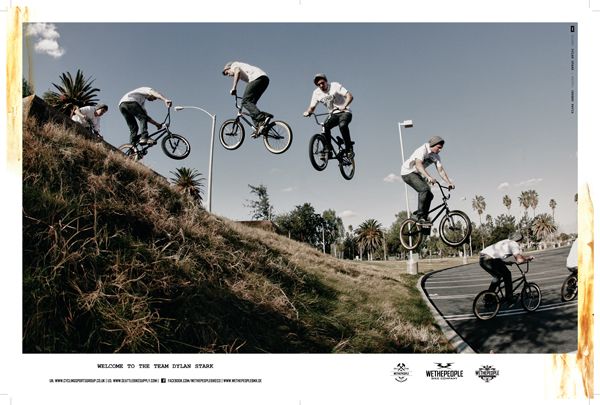
Here’s the recent print ad for Wethepeople featuring the sequence above. Click the image to see it bigger!
If you followed these steps correctly you should be well on your way to getting addicted to putting .GIFs together just like I am. It doesn’t take much to do, it’s a rad way to look at an image in a different light and it’s a something else for you to know how to do to help you become more of a well-rounded photographer. Also, just like last week don’t forget that the TTL contest is in full swing. Don’t forget to get out there and put in work for your chance to win some rad products from Madera.
Be sure to check back next Wednesday for the eighteenth edition of Through the Lens. As always feel free to leave any questions in the comments section or email me at info@jeremypavia.com and I will hit you back as soon as I can. Feel free to follow me on Twitter and Instagram @JEREMYPAVIA.
Also, don’t forget to follow The Union on Twitter @BMX_UNION and help us reach our goal of 10,000 Likes on Facebook.
Want more Through The Lens goodness? Check out some of the past editions below.